Orthographic
Orthographic Example
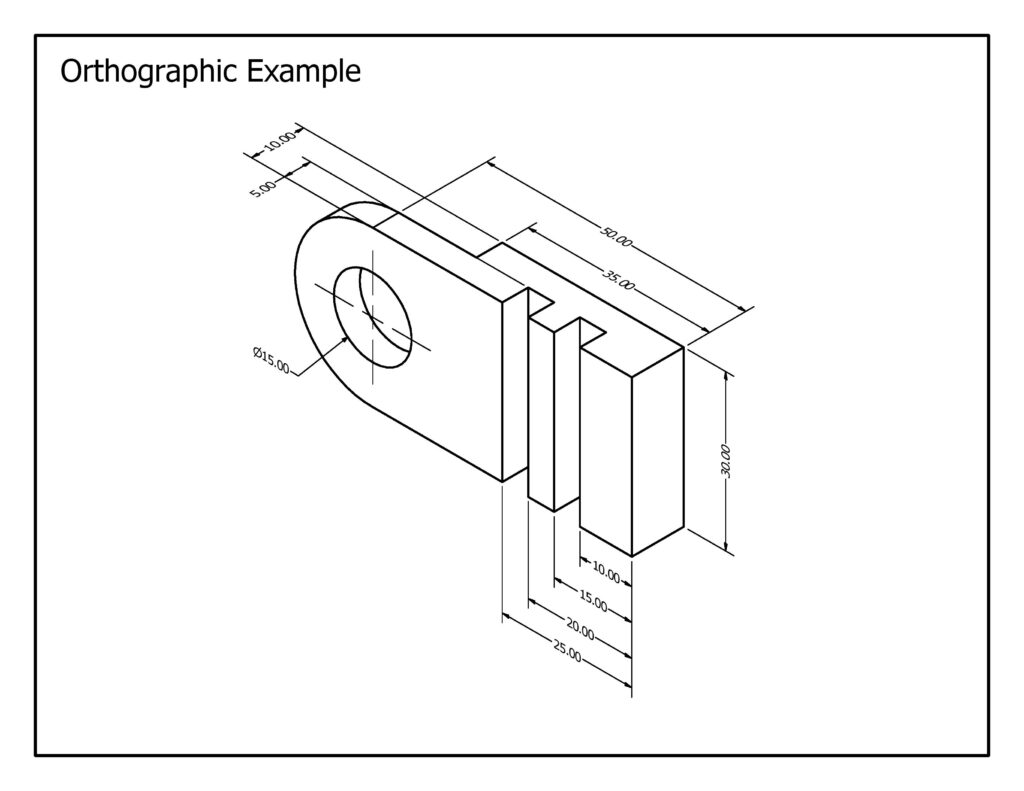


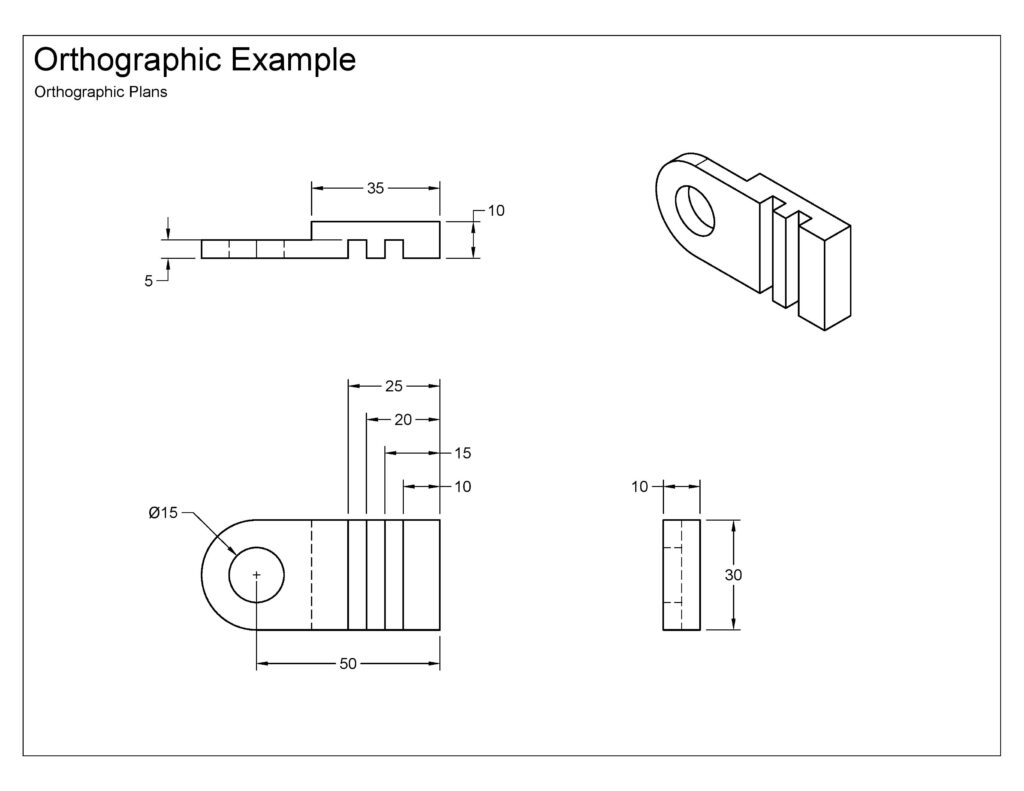
1. Create Model
Use the orthographic plans (right) above to create the 3D model for this example. Note: isometric views (left) do not typically have dimensions.
2. Setup Drawing
3. Add Views & Dimensions
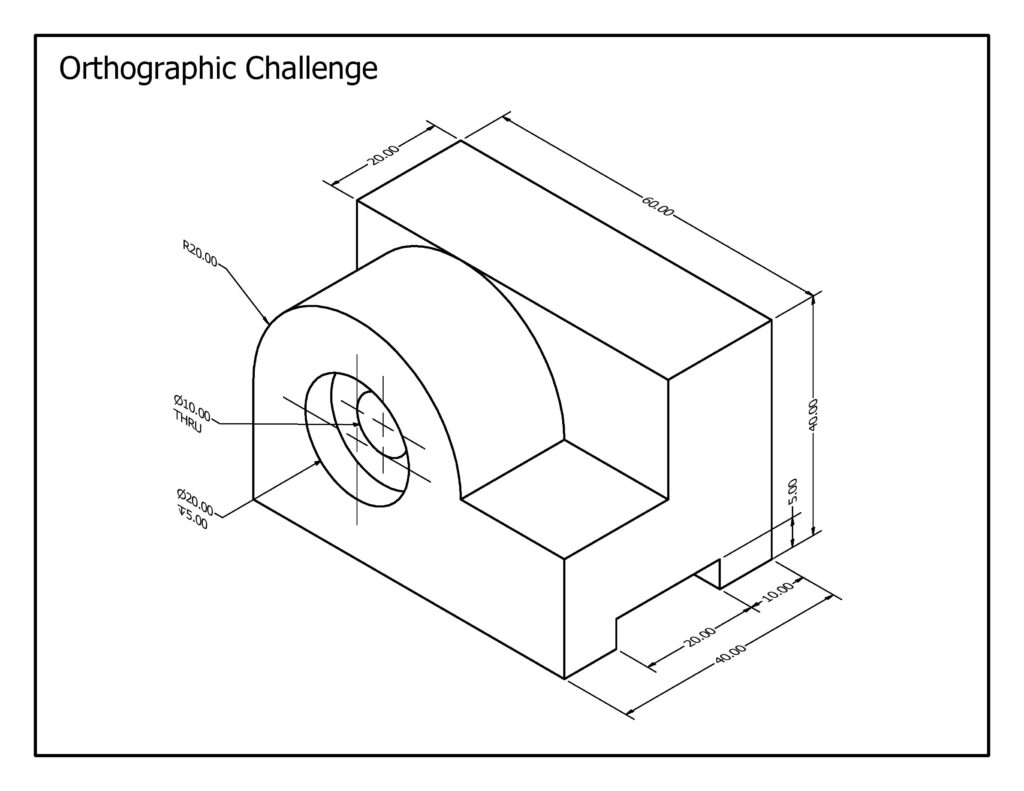
Orthographic Challenge
Use the isometric drawing below to model the part and create a set of orthographic plans. Apply the following principles as you annotate your plans:
- Include enough information for the reader to create the part, but avoid any extra dimensions
- Always dimension object lines (solid), and never hidden lines (dashed)
- Annotations (dimensions & notes) should be placed outside the object
- Try to make your plans as readable as possible and avoid crossing dimension lines when possible